Sunday, June 29, 2014

Meet the royal Princesses

Emily is turning three in September and she's starting to talk a lot. She's at the age where she loves princess and disney stuff. We went to a birthday party not too long ago and they had a princess themed party and so of course when I asked Emily what kind of party she wanted she said a "I'm a princess. I want a princess party." In preparation for her upcoming princess party, we asked our photographer to take some pictures of both of our princesses.

Credit goes to our super hard working photographer because my two princesses were not cooperating during the photoshoot. Kaley was fussy all day and had a stomach ache while Emily was throwing her usual tantrums and being camera shy. You can view more at Le Photography or through their Facebook here. I've mentioned before that taking professional family pictures are so important because our kids are only young once. As sad as it may sound but overtime we forget how they look as newborns. Their details seem to blur overtime. Since the weather has been so warm and I was about one month post partum our photographer was able to take all the pictures in the comfort of our home. Being able to take pictures at home was the biggest plus with our photographer.

First up is the first time ever, grand introduction of our Princess Kaley. I've been holding out on posting pictures of Kaley because I've been wanting to post her newborn pictures. Finally here are some pictures of our newest princess.


Here is our royal Princess Emily.


Friday, June 27, 2014

Office reveal

I'm excited today because I hung up the clock in Binh's office. I used one command strip and some mounting tape. I still need to order some clock hands but that can wait. Finally the office is 98% complete. If I remember correctly, total budget so far is about $350.


Here's a horrible up close picture. This clock looks pretty good to me because its so cool and masculine.  It also matches the polyhedron pendent that I made a few weeks ago. 


Here's the desk with the clock. Now the space above the desk isn't so empty. Its a great size for the space and adds a good amount of contrast without adding darkness to the space. I wanted something with high contrast to the room to add drama without making everything look dark. In pictures I feel like Binh's desk looks like a big black glob but the clock breaks it up nicely and distracts from all the black. 


Here's a wider view of the room. When you first enter the office, you automatically are drawn to the polyhedron pendant light and the clock. I do feel that they are the statement pieces of the room without overshadowing the furniture and decor. 


Now the walls in the office don't look so empty anymore. I feel that adding accessories to the wall really makes the room feel bigger because it draws your attention upwards. It also makes a house feel more like a home. Empty walls make a house feel naked to me.


Here's the rest of the office: 


Here's a side by side comparison from before and after: 


Thursday, June 26, 2014

$3 clock

Today I put my kids to sleep early for their nap and something magical happened. The DIY fairy came. Just kidding. I turned $3 worth of foam into a knock off version of the restoration hardware Belgium tower clock. I've been spying on decorative pieces to go into the office above Binhs desk. I was searching for something large in scale, didn't have sharp corners, looked masculine, and cheap.

Here's the clock from Restoration Hardware: 


According to their website this clock cost $1,495. And no that wasn't a typo. There's really four digits. So my cheap self decided I wanted this clock in Binh's office. The original clock is 60 inches and I only wanted about 40 inches for the room. So I dug up some white foam board I purchased at Dollar tree a few days ago for another project and started cutting away with my exacto knife while my two monsters lovely kids were napping. I actually attempted to do this project a few days ago when my kids were awake and it was impossible, so everything was on hold until today.

I started off by cutting a very large 40 inch circle. I made another inner circle with the cross inside.


Then I just cut some strips and started taping the roman numerals onto the clock with masking tape. To make things a little fancier I added some left over nail heads onto the foam.


After about an hour of cutting, measuring and taping, I got to this: 
I just realized this picture makes the clock look uneven but its just the angle. 


Finally, I whipped out my paint brush and used some left over black paint and started painting away. In the picture below you can see the nail head a little better. 


Its currently sitting outside to dry in the sun. I can't wait for it to dry and finally hang it up above of Binh's desk. That space has been empty and crying to be decorated. I'm in the look out for clock hands but have found that they cost about $20 for the size that I'm looking for.

Not bad for $3 worth of supplies IMO. Some tips if you don't have all the supplies: Black acrylic paint works just as well as black paint. If you don't have nail heads, use the brass thumbtacks. All supplies can be found for $1. So whole project would cost someone without all the supplies $5. For a statement clock this size, $5 is totally worth it.

Monday, June 16, 2014

Forgotten post

I'm so happy to announce that I've successfully finished off Binh's desk. I've actually finished it a while ago but forgot to publish this post. I was so busy because my husband was out of town for a whole week and I was left with two kids by myself one month post partum and that same weekend my brother  got married. Talk about a crazy busy schedule. I was so behind on everything that I didn't even have time to get myself a decent dress for my brothers wedding. In addition, the following week our Kaley turned one month so we decided on a whim to do her baptism and have a party for her, so I put together a party in two days. Anyways, back to the desk, to refresh your memory, the desk started off looking like this:


If only you knew how much I hated that desk.... It was too big, too ugly, and didn't match our office space. So over the course of a few weeks this free desk from CL got a transformation.


And finally, here it is in all its glory in place of the ugly old desk in our office. I finally put a protective top coat on the desk and was able to put some of binh's stuff back on the desk. I didn't have enough time to style the desk yet because my kids woke up. I barely had enough time to tape up an outline of artwork that I plan to hang up there. I'm not sure what kind of artwork i plan to put there yet but I know I want something of a large scale and with lots of dark and light contrasting colors. I feel like the desk is so dark and the monitors/keyboard/etc is also so dark that I need to break up all the darkness. 


The desk still looks quite busy and doesn't stand out yet but i'm not done with this side of the room. Once I figure out the accent piece of artwork above the desk, things will look much better. And as far as Binh's ugly ergonomic chair.... I would love to get rid of it but Binh said he loves that chair. Since he's actually working and sitting on that chair quite a bit I won't be touching that chair. So far the only thing that I've kept in his office are the black couch and his two chairs. I let him switch out between his all leather chair and ergonomic chair. 


I placed his ergonomic chair near my desk and put a cheap $1.99 Ikea blanket over it. It serves as a nice  comfortable extra seat near the sofa and Binh can easily switch out his chairs whenever he feels like it. It also helps to fill up the space in the room since the room feels rather empty along the walls. I also pulled out our storage ottoman and placed it along the wall of the window. It has been hiding in our master bedroom but since Kaley's stuff is taking over I had to find a new spot for it. 


Here's my side of the room. The walls still look empty but it does look clean and clutter free which I really like. 


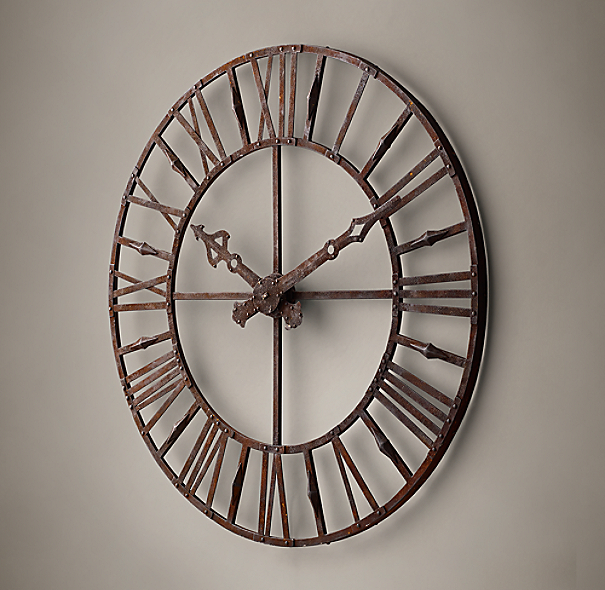
Here's Binh's desk once again. I plan to put some kind of large dramatic artwork above his desk. I've been eyeing on some extra large clocks but haven't found one that suitable for his space yet.


And finally a before and after of the office space. 


Heres the total budget breakdown so far: 

Large entertainment center and paint: $60
Desk: free
Accessories for desk: $63
Kmart rug: $40
Three ikea Virserum frames and octopus art: $44
Marshalls chair $18
Curtains $25
Pendant $20
Storage cabinet: $25
Binh's desk: $20 (desk free but I bought more brushes and a top coat)

Total: Under $325


Not bad considering I took out everything in the room except for his two chairs and black sofa. The room was never meant to be fancy or perfect. This makeover was only suppose to make the junk yard turn into a normal looking office. For under $350 and some elbow grease I've been able to get some quality pieces of furniture (entertainment center, two wood desks, and storage cabinet) and decor to make over the whole room. 

I will be returning to work in 6 weeks so I hope to be able to fix/clean out our garage and finally spruce up our back yard. I've gathered some budget friendly ideas for my garage makeover so I hope to be able to share it soon.