Sunday, February 8, 2015

House Tour 2015

Today I wanted to share with you my updated house tour. I recently just updated my house tour with links and budgets for some of my DIY projects. I really wanted to take this opportunity to show everyone that home decor doesn't necessarily have to cost a lot of money. Anyone who owns a home can tell you home decor or even basic furnishings can get expensive. A coffee table or a desk can easily cost $200-300. Little accessories can add up real fast too. I started this blog to share with friends and family the progress of our home and to help others see that budget decor really is possible. I take things day by day and decorate one piece at a time. I've taken a little over three years to decorate our home and I am happy to say its finally feeling like its half decorated.

Aside from the house tour I also wanted to share my new kitchen pendant lights. I know lately I've been on a lighting spree but I feel that fancy lighting is like art work for a home. Lighting can feel bare and out of place if the home is not decorated but if done correctly it can act as art work to highlight the home. For instance, our office pendant I made out of dollar tree foam.

Heres the comparison with and without the pendant. I do feel that the pendant light completes the office space.


Here's our kitchen without the pendants. 


I purchased two instant pendant lights from atgstores.com for $82. We had the can lights before and I hated the fact that I had to bug and harass my husband to change out the bulbs when it dies. Sometimes our bulbs would remain dead for months before Binh would change it.  Our kitchen ceiling is 12 feet tall so Binh has to bring in the extra tall ladder to reach the top. Now with these pendants in place, if the bulb ever dies I can change it myself instantly. After I mentioned it, Binh agreed this was one of my best investments for our home. 

I opted for the brushed nickel because bronze would blend in too much with my dark cabinets. The brushed nickel goes well with our appliances. 


Here they are at night. 


Its hard to capture how the pendants draw your eyes up and play out our super tall ceilings. You guys will just have to take my word for it. Our home is feeling a little more grown up and complete with these pendant lights. 


Friday, January 9, 2015

Living room orb chandelier

I'm back and have exciting hacks to share. Recently after completing my master bedroom orb chandelier I spotted Property brothers orb chandelier and fell in love. I have always loved the orb chandeliers that restoration hardware has but knew I would never spend $1K+ on them. I've been slowly decorating our home but have recently come to realize that the spaces that we use the most, I haven't really decorated. We spend the most time in our living room during the day and in our bedroom at night but those two spaces seem to be the last on my list for some odd reason. I've recently added some simple decor to my bedroom but as for our plain living room its been sitting idle for a while.

For those who have been to our home, our living room is a huge plain room with just the essentials. It has all the basic furniture but no decorations. I think because we have two kids and know the living room needs to be comfortable and require low/no maintenance therefore decorations have been on hold in that space. I love restoration hardware because their spaces seem so effortless, low key, and classic. If you notice their orb chandeliers in the living rooms are always huge and take center attention. Here are some examples: 


I'm not sure if the pictures show how big the room is but our sectional is 18 feet long to give you an idea of how big our living room is. It might look small in pictures but its really big and it doesn't help that the dining area and kitchen is one open space with the living room. So long story short, I need a BIG chandelier and big chandeliers cost BIG money. That idea didn't sit to well with me so I made my own. 

I'm sorry for those who want a tutorial. I have two kids and taking pictures while doing projects lately is near impossible. I'll be glad to answer any questions. I used wood veneer edging to make the big circles. I used wood glue and glued three layers to make the large circles.

EDIT: for those who are interested in the materials that I used

crystal chandelier from amazon for $160
wood veneer edging 1 7/8 from ebay 600 feet non glued $25
duct tape, masking tape, gorilla wood glue, black paint, and clear wire to hang everything up.
Electrician $150 to add wiring to the ceiling and hang the chandelier

Total cost $350 roughly.


My inspiration came from this: 


Here's my version that I teased you guys with the other night. 


After looking at it for a few days I feel that its so big and dramatic for my living room. Since our space is so plain and undecorated its mismatched for now. I do have plans to update our living room and vamp it up a little in the near future. I'm not sure when that will happen though. 

Here's a before and after just to show you how dramatic the chandelier really is. 


Here's how our home looks when we first moved in with the same angle. 


Wednesday, December 24, 2014

DIY budget orb chandelier

Merry Christmas everyone! This whole week our family has been taking things very slow and just relaxing since hubby was off for the week. Our home has been decorated since mid November so it was really nice to just sit back and relax. All presents have been ordered online so all I had to do was wrap them. Aside from wishing everyone a blessed and Merry Christmas I wanted to share my DIY budget friendly orb chandelier tutorial. 

List of supplies: 
four hula hoops from Dollartree
strong tape such as packing tape 
ribbon or thin string
paint color of your choice
paint brush
chandelier of your choice 

I bought my chandelier from Overstock a very long time ago using a coupon I had. I forgot how much my chandelier cost but around $50-60. During that time, I went to Belamaria Frontier homes in Ontario when they had their model home showing and saw a gorgeous orb chandelier in one of the models. 


I came home and couldn't stop thinking about it. I wanted to buy one for our bedroom because our bedroom was just so boring and in desperate need for some attention. I considered buying an orb chandelier but realized they just cost way too much. For a simple 20 inch orb chandelier I am looking at spending about $300. 

After bugging my father and father in law to install the chandelier for me this is what I got: 


I had a fan in place and my dad didn't know how to properly remove it so he needed his witty sidekick.. my father in law but low and behold.. he loves to cut corners so this is what I ended up with. Somehow between the two grown men they were convinced this is how a chandelier should look hanging.. with a huge gap, no chain, and stuck on the ceiling. So long story short my chandelier sat like that for a very long time. After the length adjustment, I was able to officially work on my orb chandelier. 

To get started I cut two hula hoops in half and taped them onto a third hula hoop. I had to play around with the hoops for a little bit before figuring out how to tape it so they would stay. I used packing tape since it was strong and taped the two open ends together leaving a small gap so I can insert the third hula hoop that was uncut. 


I tied my hula hoop onto the chandelier with some thin christmas ribbon I had laying around. 

Once attached to the chandelier I added the last hula hoop in the middle and tied it down with ribbon again.  Below is a close up picture of the bottom with unpainted clear packing tape and the white ribbon that ties the middle hula hoop to the other hula hoops. 


Here it is once again with a first coat of black paint. I painted the hula hoops before I hung them up so it would be easier to touch up the unpainted parts. Once the hula hoops are painted you can't really tell there's tape on them unless you look very close. The chandelier is hung pretty high and in the center of the room right under the foot of my bed so you have to stare at it to look for its flaws.


I repainted the whole chandelier twice to make sure I didn't miss any crevices. Here's how it looks in our unfinished bedroom. Pictures were also taken later on during the day so images aren't as clear. 


This is the view from my bathroom looking into our bedroom. Notice I recently just hung some ikea curtains on our window. 


This is how my room looks when you first enter. 


Ignore all of Kaley's temp bed and chair. It was a temporary solution until she was old enough to move out of our room. She's officially out now so we will be removing those soon. 

My DIY orb chandelier isn't perfect but it is good enough for our bedroom.  It was an easy, simple affordable upgrade to an other wise basic chandelier.  It sure makes me feel like our bedroom is one step closer to being complete. 


Monday, November 24, 2014

Greek key pillow review

Holiday season is coming up so I've been busy putting up decorations. Our Christmas decorations are officially up and almost done so the holidays is full blast at our house. Today I wanted to do a review about DIY greek key pillows.

Supplies: 

*two white old pillows that we already had and were using in our master bedroom. 

*1 yard of colored fabric, I used gray. If you are lazy you can just buy a roll of ribbon at the 99c store 
or Dollartree. For my standard king size pillow I used 3 yards of fabric/ribbon per a pillow cover. $3

*Thread the color of your ribbon/fabric. $0.79c

I went to Mylee fabric store in pomona on Holt to save money on fabric. 

Instructions 

I first started off with our regular white pillow covers. I didn't like them because the pillow cover was getting loose over time from being used. Plus I hated the open end pillow cover. It looks like this: 


I first cut them smaller and split the back in half and overlapped them by 3 inches. So the back piece I left as original length of pillow cover and cut in half and the front piece I cut off 3 inches so when I overlapped the back pieces they are the same size. 


But before I started sewing them together I did the greek key design first. I used this template for the design. I didn't use the exact same measurements because my pillow cover was a little longer. I used the  4" and 6" for the corners and just filled in the rest. 


Here's my pillow cover with the initial design marked using regular black pen. 


Then using an iron and some fabric I made my own ribbon. I didn't stitch anything. I simply just ironed a ribbon and started stitching the ribbon onto the pillow over. 


To do the the corners I followed this blogger. She did all kinds of fancy stuff like taping the ends, using no sew iron on hemming tape. I didn't do that. I just traced my design on and started sewing the ends. 

I have to admit my first pillow took what seems like FOREVER to finish. Forever to me is like 40 minutes. It was just so time consuming for me and time is what I don't have with two kids. As I was about to scrap the whole project I thought it through and decided I should finish off what I started since I will have one mismatched pillow cover. 

Fortunately, second and third pillows were much easier. Total time spent for second pillow was about 15 minutes. Here's how they look after I finished them. My sheets are wrinkly because we actually sleep in them. I haven't found a solution to keep my bed sheets super crisp and wrinkle free. 


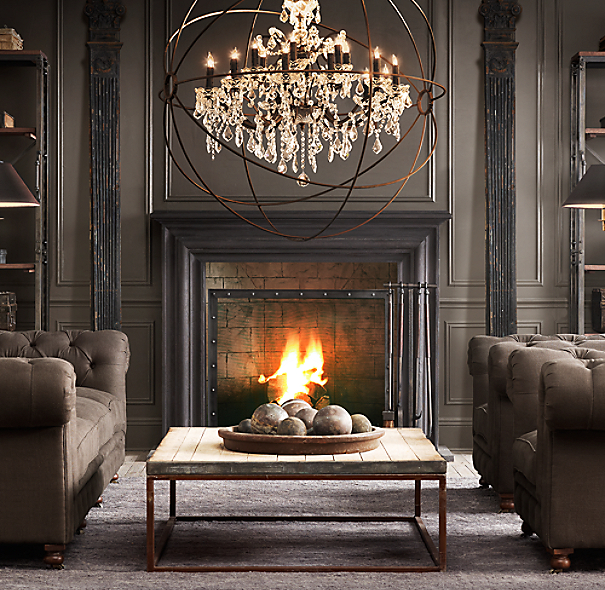
Here's a sneak peek of my in progress project. I've been trying to finish up the orb chandelier in my room but haven't had the chance.  One day I'll blog about it.


I'm trying to do something similar to this using hoola hoops from Dollartree and a very small budget.


Our bedsheets were so plain before. They were just all white. I also only use five pillows for our bed because thats what we use. Our guest bedroom has more pillows because its more for decorations. 


I also made some more pillow covers for binh's office using some fabric I found at Mylee. 


Overall I would only do this project if you plan to make at least two pillow covers. The first one will be trial and error and take a lot of time trying to figure out how to do things. However, as mentioned earlier, second and third ones will be much faster. 

Saturday, October 25, 2014

I bit the bullet

Today I wanted to talk about baby food processors. With both of our kids, we've decided to make their baby food fresh everyday. I, like everyone else, saw those commercials about the Baby bullet and had to buy one. Back when I bought it, Emily was our first precious child so even though we knew we could buy a basic blender but the Baby Bullet seemed more fitting. It came with all the cute packagings and small containers and blah blah blah. Well, $50 later and full of regrets I'm here to report that the Baby Bullet is no bueno.


Issues I had with the Baby bullet:
* Its price. At $50 it wasn't so bad a price point for our child but for the quality its like highway robbery to me.
*Its hard to clean. On the rim of the bottom piece of the baby bullet, there is a plastic ring that is impossible to take out and clean every time. I discovered that MOLD can grow on there. Look it up for yourself from other parental complaints/reviews. Mines never got to that point because I was so paranoid with cleaning that stupid ring.
*It leaks. The bottom piece at the blender leaks black fluid which is beyond gross to me. Mines might have been a bad seal on the machine but regardless something like that should not have happened.

Today I took liberty and finally threw it out because I can't stand looking at it anymore. I ended up purchasing a $19 Hamilton Beach blender on sale at Target and hands down it beats the Baby bullet for days.


I ended up choosing this Hamilton beach for a few key reasons. First it was compact enough for Kaley's baby food. I liked the Baby bullet because I thought I didn't have to wash a big piece of machinery just to make three small containers of baby food. I usually make fresh baby food everyday or almost everyday, so a standard size blender is a little too big. The HB blender single canister serving container is the perfect size for 1-2 days worth of food for Kaley. Second, its simple to use. I've used other fancy blenders with an LED touchscreen monitor on it and 100 features for different blends and honestly, I don't really care for all that. I'm simple, I just need one on and off button. Third, its really easy to clean. The blender itself is only three pieces that I would have to wash. No hidden crevices like the baby bullet. No heavy glass canisters like some other fancy blenders.

However, the only thing I liked about the Baby bullet was that it came with a recipe book so you can make various types of blends for your baby. As a first time mother with Emily, I was clueless on what gourmet dishes to make. But honestly, its pretty basic. You first start off basic with only single fruits/veggies for a few consistent days and move on to combine two fruits/vegetables to blend. Here's a quick and easy explanation from the Baby bullet website.

I hope this post can save other parents some money and skip the Babybullet.