Friday, March 28, 2014

Change of plans

I've finally completed painting the three major pieces of the entertainment center and its been moved into the "office." Here's the space before and now for comparison at the same angle.  The corner computer desk is moved to the other side of the room and sofa has been pushed over towards the corner. This will be the new layout of the room. Heading out later to look for a simple, affordable, easy to maintain rug for sofa area. 


I just finished painting some of the cabinet doors and half of the shelves. I can't wait for them to dry and hang them up. I've stuck some of Binh's junk in the empty cabinets for now. Here's how the room looks when you first enter through the french doors. 


And some new exciting changes that I've picked up from Craigslist for FREE...  Two desks...


This one will belong to me.  I plan to put my sewing machine on it and it will be my new craft table/work station.  I can't wait to repaint it. I love the legs and the details.


This is Binh's new office desk. He's not happy with it because he says its not big enough for him but I don't care.  The two desks that we have are too big for the room. It fits but makes the room look so crowded. I'm giving those two desks away. PM me if interested. I plan to refinish this desk too.


I'll be back on Tuesday to give more updates. I have a busy schedule this weekend packed with parties and events to attend so no new updates. Hopefully, by Tuesday I'll have the entertainment complete and half decorated with the TV in place. As for now, have a good weekend everyone. 

Tuesday, March 25, 2014

After two days of purging

Heres a quick update of what has been going on in our crazy house. Binh's office is actually pretty empty and have been stripped back to its bare bones. The room is far from where I want it to be but I have no more energy today so I'm hoping to be able to vacuum and steam clean the floors tonight and call it a day. Here are pictures of the office today after our recycle and regular trash bins are completely full. This angle of the room looks pretty empty. I plan to have two desks on this side. One is already in place and just need to be moved over a little. The corner desk from the other side of the room will be converted back to a regular desk and place on the opposite side of the room. I tried to give the corner desk away but couldn't find a kind enough person to take them off my hands so I guess I'm stuck with it.

Here's a before and after for comparison: 


Here's the other side of the room where the large entertainment center will go. The whole wall will be covered by the entertainment center. The corner desk will be converted to a regular desk and moved to the opposite side of the room.

Here's a before and after of the same angle: 


The two sofas and ottoman will remain in that area. I will reupholster the two ottomans with some fabric I have purchased a while ago. I also plan to move the sofa over to the right more once the corner desk is moved to the other side of the room. The room will feel more like an office and man cave with separate designated areas for each side.


I didn't want to spend extra money on the entertainment center. I want to keep things simple and budget friendly so I used some old paint I had left over from the master bedroom dresser project. I had a good amount left so I'm hoping it will cover the whole entertainment center. The color was solid enough to only require one coat with no primer, meaning just one coat of painting for me and minor touch ups if needed.


I had to split the painting into three days because I simply don't have enough energy to paint all three at once. I really felt like I cut corners with this project because I was so tired that I didn't bother painting the inside of the cabinets that will be covered with doors. I figured I'm going to stuff a million and ten things in there and it will be covered with a door so why even bother. One full coat of paint covered pretty good to me. I might buy really fine sandpaper and smooth out some rough spots but lets see how my energy goes.


I cut corners with the middle cabinets by not painting the sides. I figured the two side cabinets when in place will cover most of the middle cabinet so why bother painting it.


I have one more side cabinet to go and the doors to the cabinets to paint. Looks like I don't have enough paint so i'm heading to Homedepot to pick up another quart of paint. Hopefully, my dad and brother will come over soon to help me rearrange the furniture and bring this entertainment inside before it rains.

Future plans for this room include:

*Rearranging all the furniture
*Refinishing/makeover both desks
*Converting the corner desk back to a regular desk
*Adding some masculine art work along the walls
*Adding some storage cabinets/options to the wall near the window so I can store our vacuum
*Upholster the two ottomans with some fabric I have laying around
*Adding some curtains to the plain, odd, small, dark window
*Get new office chairs
*Add a rug to the floor so its not so cold
*Make some nice pillows to soften up the black sofas


Budget breakdown so far:

Entertainment center from CL $40
One quart of paint $15

Saturday, March 22, 2014

The forbidden zone in my house

Today I wanted to take you into the forbidden zone in my house. This zone has many names. Its been called Binh's office/playroom, dog house, and the obvious .. the junk yard. If you have a weak stomach, please skip this post and not look at the pictures. They are just that bad. I hate going into that room because I feel sick and so tired just looking at it. Today, I got the courage to go inside and actually took pictures so I can see what I can do to make this space a little less horrific. As mentioned before, I have purchased a large entertainment center on Craigslist for $40. Its huge, spanning ten feet across and made of solid wood. Its been sitting in my backyard for over a month. I've been working on finishing up the girls nursery and guest bedroom. Now that I'm done with both of those rooms, I can move onto the forbidden zone.

Here are some pictures of the entertainment center: 
Its solid and has lots of compartments so I can hide all of Binh's junk. 


Finally, here are pictures of the junk yard. The room itself is quite big. It has two sofas, 3-4 chairs, two large desks, and whole lot of random junk. 


My goal for this room is to de-clutter and make storage compartments for everything. I will be giving away one of the desks to whomever willing to take it. The desk itself is in good/new condition, just looks bad with all of Binh's junk on it. This room needs a lot of help so my budget will be under $400. Good thing i'm almost due because I'm sure cleaning up this room will put me into labor even if I wasn't almost due. After painting one cabinet, I'm officially tired and need to rest up for the day since I have an event to go to tonight. I'll be back on Monday or Tuesday to do updates on the entertainment center. Have a good weekend everyone.

Friday, March 21, 2014

Mirror mirror on the wall...

Today, I finished off the guest bedroom with a mirror that I found at Burlington Coat factory for $40. It took me a long time to decide what I wanted to put above the bed. I actually purchased three frames from Ikea for $12.99 each but have decided to hang them in Binh's junk yard instead. I didn't have any art work to put in the frames so I hung a mirror instead. The guest bedroom is super tiny and has a large queen size bed so adding a mirror will only brighten and make the room feel larger.


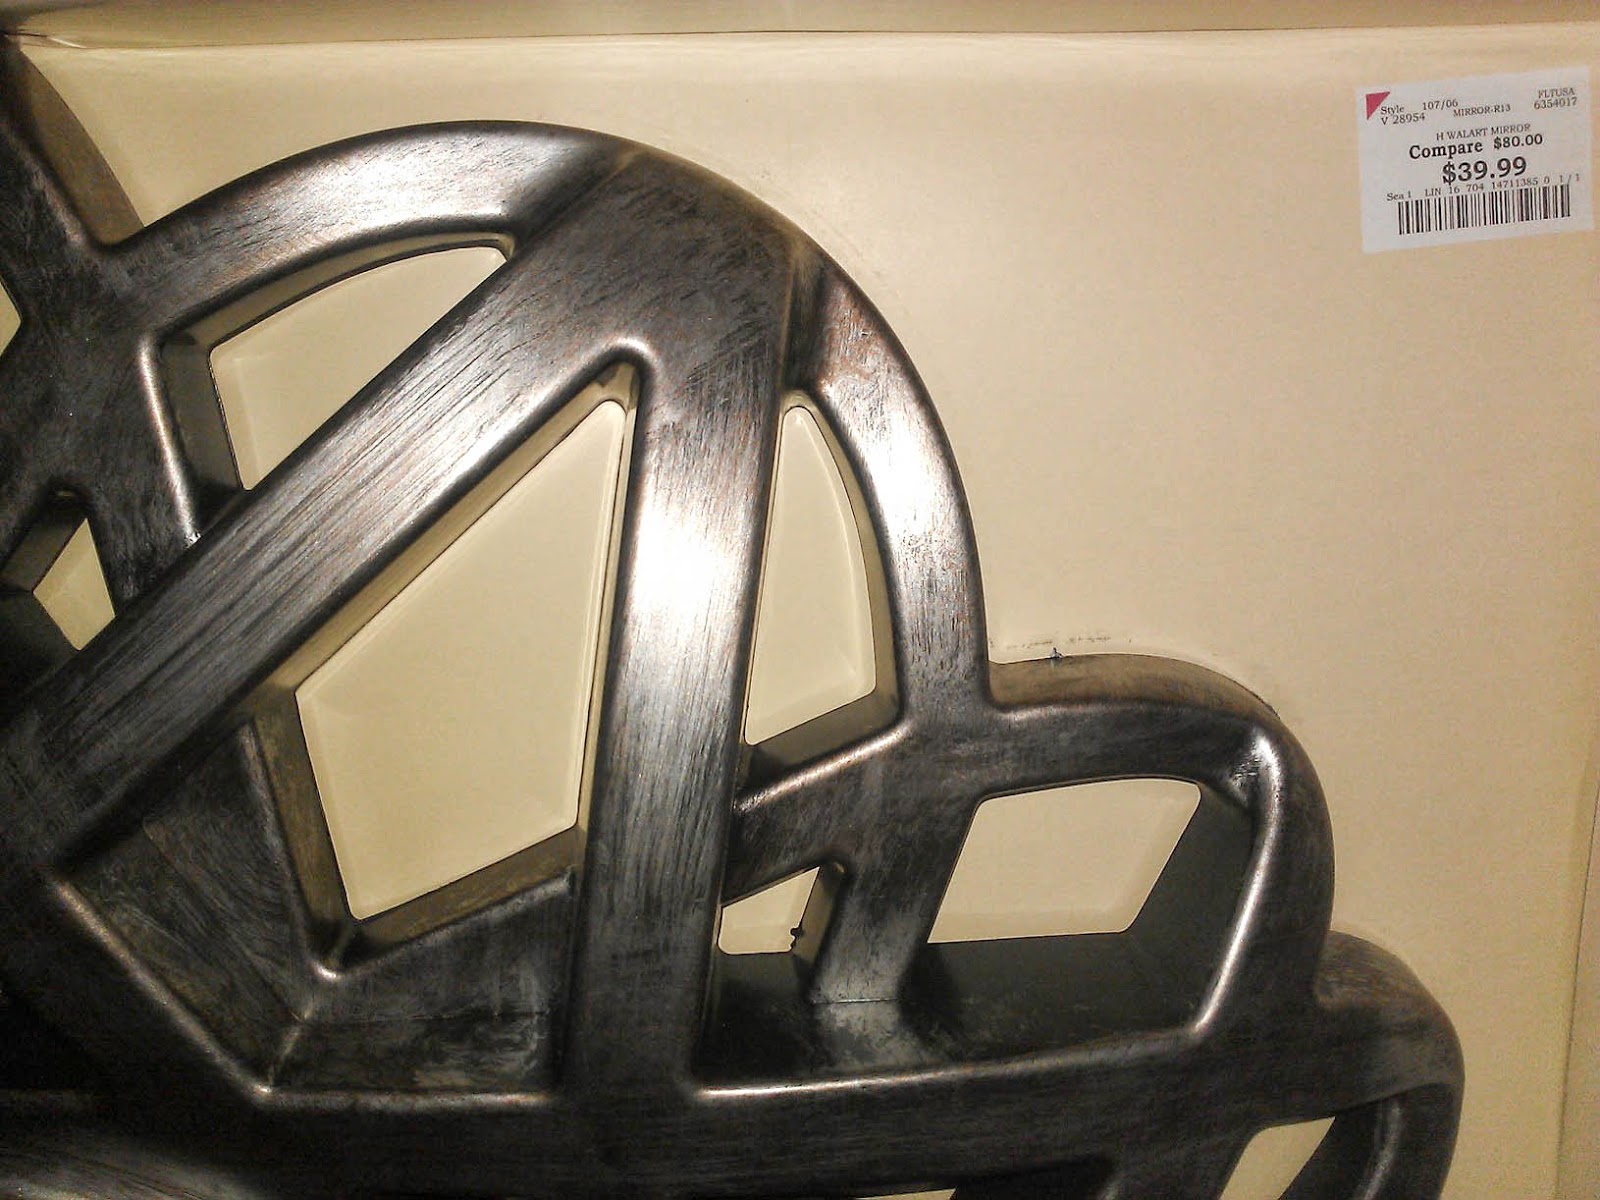
Here's the mirror. I love the shape, design, and color of the mirror. I didn't want all the furniture and decor to be dark brown so this dark antique bronze look is perfect for the room. Its also huge. Its 30 inches and weighs under five pounds since its made of plastic.


Here's a close up of the distress antique color. 


Here are the frames I purchased at Ikea. I might return them. I'm not sure yet. They are a good price for the size and quality. It also comes with a mat and feels pretty solid. 


I hung up the mirror with my wonderful command strips. I scored two packages of command strips for sale at Target and I used a manufacture coupon for $3 off two command items. Command strips aren't cheap but they beat harassing my husband or dad to hang up frames. Its so much easier and more convenient. But most importantly ... when I hang them, they always come out straight and the way I want it. When the men in my life hang up stuff they make something simple so hard and its always crooked. The mirror was under five pounds  so I knew it was more then safe to use the command strips to hang it above the bed. I am over eight months pregnant taking care of a toddler and was able to hang the mirror up in under ten minutes with no problems so I know anyone can use the command strips. So ladies... no excuses for not hanging up frames in your house. 


This is how the back of the mirror looked with the command strips in place. I used four strips just to make sure. 


Five minutes later I got this: 


Finally, the wall above the bed doesn't look so boring and plain. 


Another quick update that I did to the guest bedroom was covering the $8 Target tv table with some left over blue/navy fabric I had. I just made a simple cover. I didn't have enough spare fabric so the back is empty but no one will really notice it. 


When you lift the middle part up you see my hidden storage area. The two large candle holders use to be in the closet but I stuck them under the table and hid it. I wanted to make a cover the table because I didn't like the legs of the table and the lamp wire was exposed. The table itself was only $8 so I didn't expect anything fancy. I just wanted functional and affordable.


I am really thinking of buying a larger lamp for the room. Its just too small IMO. I might just look for a larger lampshade with more drama. I'm not sure. This guest bedroom is pretty much finished except for making a new cover for the red pillow over the chair and finding a nice blanket for the chair. Right now I just stuck some left over canvas fabric I had over the chair. It works and I might just stitch some white fleece on the underside and call it a day as a new blanket. 


Here's a before and after of the side table. 


Here's a before and after of the guest bedroom: 


Here's the total so far:

Comforter set $35
Henny Rand curtains from Ikea $35
Small tv tray/table from Target $8
Plain white queen bedsheets $15 from Ross
Two blue decorative pillows- DIY project from a while ago
Ikea Hemnes shoe cabinet $100
Oval Ross mirror $25
green tray from Target $1

Closet clean up $8
Mirror from Burlington coat factory $40
Thrift store lamp $10

Total $277

I was also able to recover some decorating costs by selling our dining room chairs on craigslist for $120. So I really only paid $157 for the whole room transformation. I think I did pretty good considering my budget was under $300 and I started off with almost nothing in the room. I was able to get a dresser, side table, hang curtains, clean out the closet, fix up the closet, and hang decorations on the walls. 

I'm really hoping I can finish off Binh's junk yard before I deliver Kaley. I actually purchased a large entertainment center to go in there but haven't had the energy to repaint it. I will try my best to tackle that room soon before my due date. 

Tuesday, March 18, 2014

$10 guest bedroom update

The last week or so I've been busy cleaning out our house. I've been pretty active on Craigslist selling all of the stuff we don't need anymore. Since I was working on our guest bedroom, I decided to clean out the closet. I've never really been a big hoarding type of girl so it was a fairly easy task. The guest bedroom closet itself wasn't very big. It was just a standard size closet with bifold glass sliding doors. I stuck our spare formal dining chairs in there since I didn't want them to get dirty. Its crazy how my chairs use to look before I reupholstered them white with nail head trim. The three chairs sat in my hallway almost a week before they were picked up. I was able to sell three chairs for $120 on Craigslist. This is how our guest closet looked prior to the clean up:


Then I brought in an old frame I already had from Emily's party. Her picture was still on the frame. 


Then off to the Dollartree I went, to look for affordable closet options. Under $10 later, I came back with this closet. 


I already had the plastic drawer in my garage. All I did was clean it up and moved it into the closet. It was actually our master bedroom night stand for about a year into living at this house. I've mentioned before that when we moved into our house we had nothing.. and I meant literally nothing except for maybe three towels, two pillows, and our clothes. Dollartree sells black and white floral contact paper for $1 each roll. I bought three rolls, two cardboard file boxes to wrap, and two sets of white hangers. The rest of the boxes/bags I already had laying around in my house. I really feel that adding the boxes for storage really makes the closet look and feel much cleaner. 


Finally, Emily's old white frame got a simple facelift. I used some left over metallic paper and added some simple DIY artwork from our very printer and hung it up with my beloved Command strips. 


The wall in between the door and closet was very bare and I didn't know what to do so I added the frame to break up the space. I feel that its simple, free, and doesn't clash with the rest of the decorations. 


Just a few more quick updates and this guest bedroom will be done.


Here's a side by side comparison of the before and after:


Here's the total so far:


Comforter set $35
Henny Rand curtains from Ikea $35
Small tv tray/table from Target $8
Plain white queen bedsheets $15 from Ross
Two blue decorative pillows- DIY project from a while ago
Ikea Hemnes shoe cabinet $100
Oval Ross mirror $25
green tray from Target $1

Closet clean up $8

Total $227

Sunday, March 16, 2014

Amazon versus Ikea shoe cabinet

Today I wanted to do a quick review of my recent purchase from Ikea. I bought a few things from Ikea and one of the items were the Hemnes shoe cabinet for $100 in dark brown/black. The price was okay, the size was perfect for my little space, and the color and look was what I was searching for. The Hemnes took my younger brother about two hours to assemble and he has no experience with putting anything together.


This is how the dresser looks in the guest bedroom before anchoring it onto the wall. I like that it sits flush against the wall. 


Once anchored onto the wall I searched for accessories I had around the house and also went to Ross to find a mirror to place above the cabinet. I knew I wanted a mirror that was not square or rectangle in shape because I wanted to break up the sharp angles. The color of the mirror was perfect, had extra chunky molding, and very light weight. I think its made out of some kind of plastic. I purchased it for $25 and hung it up with my beloved Command strips. 


Here's the inside of the cabinet. Its a perfect size for holding larger shoes and can fit a few shirts and towels in one cabinet.  The only pet peeve I have about the Hemnes cabinet is how hard it is to pull out the cabinets. I'm hoping over time it will smooth out and be easier but as for now its very hard to open. 


After looking at the mirror in place for about half the day to see if I really like it on that spot, I hung the mirror up with the help of Binh. Took us literally ten minutes to hang it up and it was so easy. This is how it looks with mismatched accessories. Clear vase was something I had already from the Dollartree, green tray was from $1 bin at Target, and two candles I already had in hand. 


Mismatched accessories are an easy fix in my book. Nothing a little left over white spray paint can't fix.


After I spray painted the green tray white, I also added some fun white stripes to the vase to add dimension. I used blue painters tape and it came out perfect. I also added some pink flowers I had from our Christmas tree. 


Here's the final angle once you enter the guest bedroom. I love that the space feels very open. The Hemnes cabinet was the perfect height and width for my little space. Adding the mirror makes your eyes travel upwards creating an illusion of a larger room. 


Overall review to my white Amazon shoe cabinet, I liked my white shoe cabinet better. Quality was about the same but my white shoe cabinet felt sturdier inside where the shoes were stored, had more space to store shoes, knobs were a little more fancy, and most importantly its very smooth and easy to open and close the cabinets. Here's the post about the white Amazon shoe cabinets post 1 and post 2. However, I don't regret buying the Hemnes shoe cabinet because it really fit the space. Its a little taller then I wanted but still works well for our room. 

So far here is the budget breakdown for our guest bedroom makeover: 

Comforter set $35
Henny Rand curtains from Ikea $35
Small tv tray/table from Target $8
Plain white queen bedsheets $15 from Ross
Two blue decorative pillows- DIY project from a while ago.

Total $93

Plus: 

Ikea Hemnes shoe cabinet $100
Oval Ross mirror $25
green tray from Target $1

Total $219

I've also bought a few more smaller items to decorate the room and is coming very close to the $300 mark. I'll try to give more updates soon once I'm done. 


Of course here's the before and after shot of the same space for comparison.