Tuesday, February 25, 2014

Artwork above Kaley's crib

I've been looking for some simple artwork that I can put above Kaley's crib. Her wall was so empty compared to Emily's princess canopy. I wanted to look for something meaningful and easy to make. I designed some simple artwork and had it printed out at CVS for $9 on matte photo paper.

I first used an old picture frame we had laying around our house. The frame was our old wedding frame that got displayed in front of the wedding venue. Those who are Vietnamese know what i'm talking about.  I had Binh hold up the frame to see if I liked the arrangement. After looking at it for a while, I thought it looked better in a lighter color frame. So off to Joanns I went to look for acrylic paint.


I spent $2 on a metallic Martha Stewart light pink/off white acrylic paint. I brushed the frame with some left over primer and waited one day before applying the acrylic paint. Whole process took about ten minutes for each coat and drying time in between. I was too cheap to buy a mat for the frame so I went to Dollartree and bought a white foam board for $1, cut it to size, and stuck it on the frame. 


To hang the frame, I used Command strips. I really love the command stripes to hang frames. I don't need to bring out any nails/screws or hammers. Just as simple as a sticker and follow the very simple directions. I used a $1 off coupon found online and bought 16 command strips for $7 at Target. It states that each strip can hold up to 6 pounds and I made sure to use four strips on this large picture frame. So far the frame has been up for over two weeks and still feels very secure. I love the strips because even in an earthquake the strips will hold the frame up. Its velcroed onto the wall. Compared to a nail/screw thats hammered onto the wall, I feel the command strips are much more secure and stable and cannot be pulled off the wall easily. Its baby and momma proof. LOL Here's a picture from yesterday's post. 


Here are two images of the artwork first applied onto the frame. I took the picture at night so the glare made the frame look white but its actually very pale/light pink.


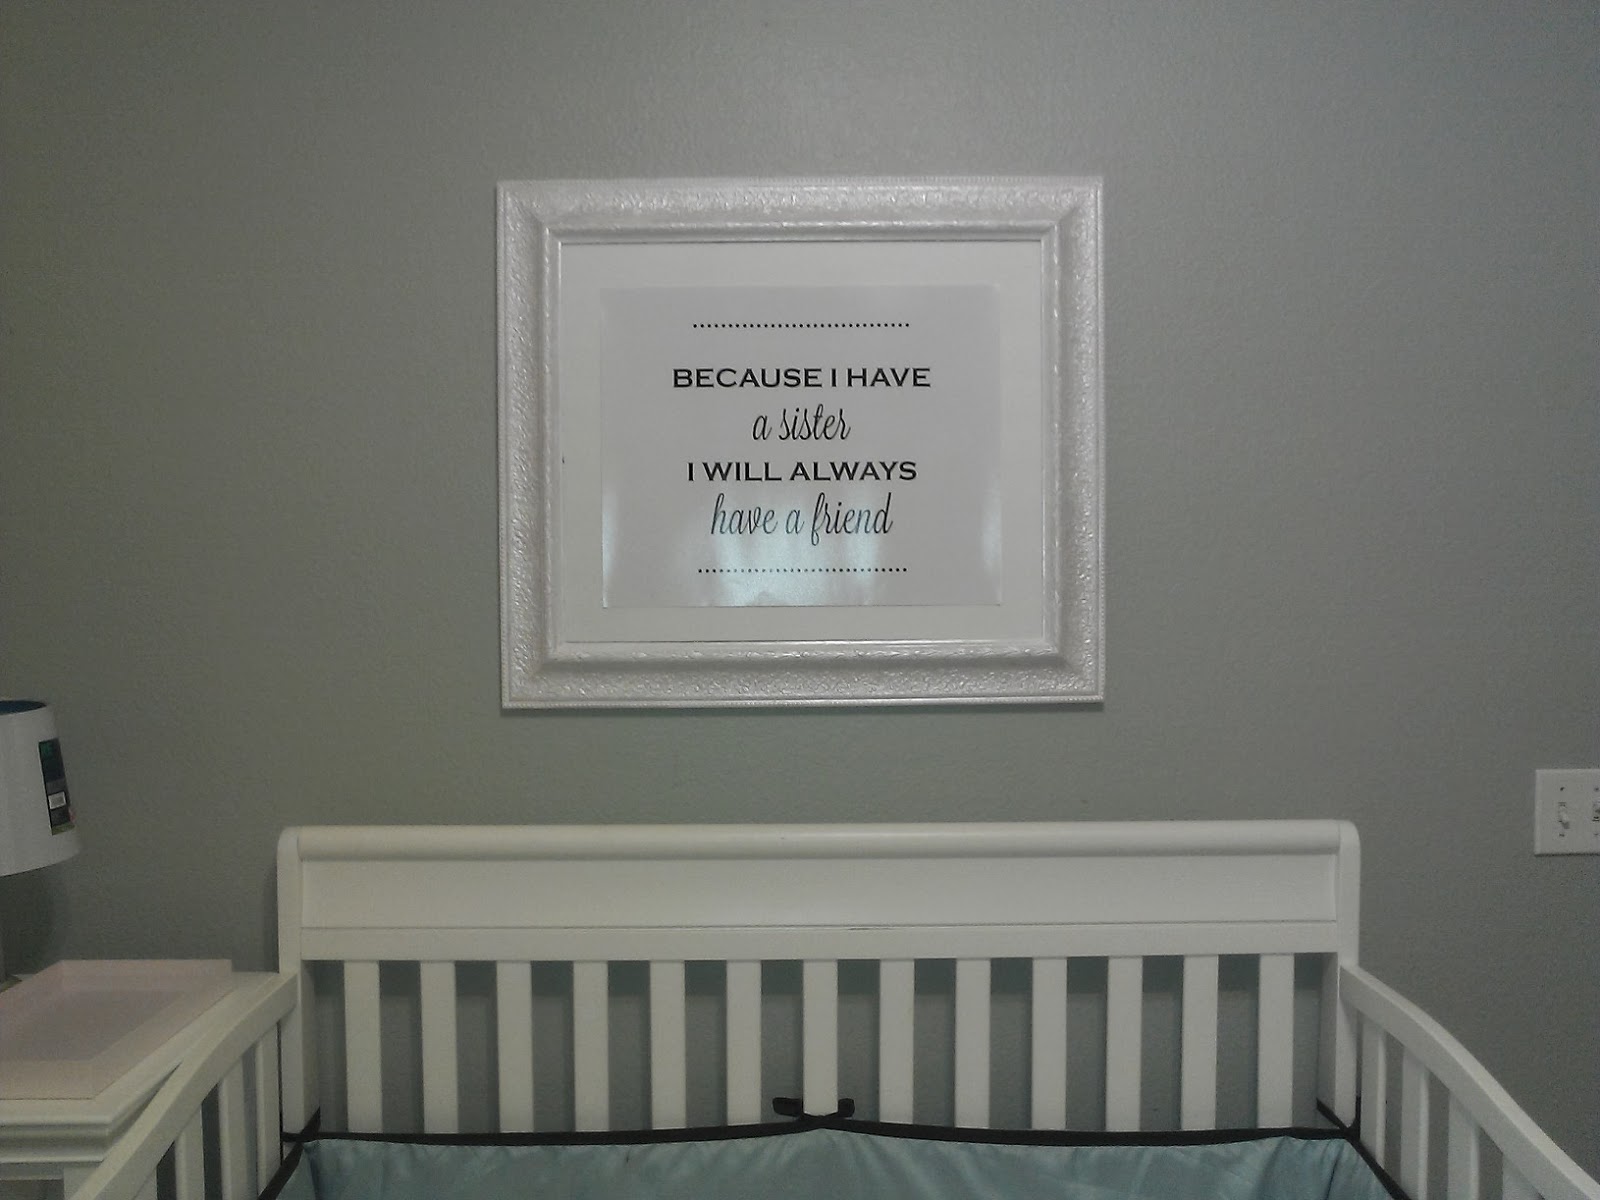
Here are better pictures from this morning with the sun shining through the large window near the crib. Its really odd how the frame looks white and changes colors throughout the day when I take pictures.  I think because it has a metallic finish it reflects light different each time depending on the day. I adore this quote because its so true. My sister and I are about two years apart and we are very close. I really want Emily and Kaley to grow up to be best of friends and learn to share things together at an early age. I also wanted more letters/word art around the nursery because Emily is starting to learn to read so its nice to let her see more letters and words in her room.


Total of this whole project cost about $12. I think its not bad of a price for such a large piece of artwork. Its also one less frame that I have to hoard/store around my house.

Frame = free
Pearl metallic acrylic paint by Martha Stewart in antique silk = $2
Matte photo print by CVS with coupon = $9 I could have printed it out on regular card stock paper at Kinko's for cheaper but just ordered through CVS since it was convenient.
Foam board/mat from Dollartree $1


Lastly, I've finally put a cushion cover for our Agen chair from Ikea. Remember this picture? 


This was the before picture of the fabric placed over the cushion to see if I liked the color combo.


Here it is after: 

I used the same fabric I made the girls bedding with. It was just some old brown bedsheets.


Monday, February 24, 2014

Search for a new lamp

I've been keeping an eye out for a new lamp for Emily and Kaley's room. I'm not sure if prices have gone up dramatically or if I'm just getting cheaper by the day but I really couldn't find anything I liked for under $30. It doesn't have to be super fancy but just something small and cute. I decided to visit Goodwill and spotted two lamps for $11 total. One green colored lamp for our guest bedroom and a glass lamp for the nursery. I dropped by at Target to do my weekly routine visit and scored some clearance lampshades for only $3 each. 


 Here's the small glass table lamp I got for $6. 


This green colored lamp will go in the guest bedroom once I repaint it another color. I'm debating on what color to paint it. I'm thinking just white since I already have the paint. I'm too lazy to go get new spray paint. Scored this for $5.


Target had these lampshades for $3 each on their clearance section. I grabbed two to finish off our lamps.


Once I got home, I didn't even remove the plastic from the lampshade yet and tested it out to see if the combination works for our nursery. So far I like it. I don't love it but for the price, I can't complain. Its the perfect size, not too much competition with the rest of the decorations in the room, and the price I wanted to pay. One day when I repaint the green lamp in the guest bedroom I will repaint the middle brass part of this lamp too. It doesn't really bother me too much but I would prefer it silver or white instead.


Here it is on the stand next to Kaley's crib. I also got rid of some decorations on that stand and added more neutral and pale pink decor I had laying around the house. The sun is shining into the room so the pink looks way more pink then it really is. 


List of supplies/decor on shelf. 

Next to the lamp is just a pale pink lid from an old shoe box. Its sturdy, matches what I want, free, and a good size for that spot. The piggy we bought from Target on clearance a while ago has always been there so nothing new. The little basket was from a gift and I kept it to put random supplies in there. I put some newborn clothes I got from our sweet friend Bev. The last shelf just has an empty Janie and Jack gift box that I've kept for decorations. 


Here's an updated picture of Kaley's side of the room. Once I'm done with her side, I will do a post on the frame, how we hung it, and the details of the artwork. Kaley's side looks depressing compared to Emily's grand princess canopy bed but I'm not done. Once I'm done, both girls will have their own unique spot in the room. 


Friday, February 21, 2014

All about Emily's big girl bed

I've been working on Emily's big girl bed for some time now. Its finally complete. We came across some minor issues when the bed arrived. First some of the pieces were broken so we couldn't put the drawer together. It took about 3 weeks for new parts to be delivered to us.


We purchased the Dream on me toddler daybed with drawers on Amazon for $130. Here's the link. And here it is with Emily napping on it for the very first time with her dad's sock. 


The bed sat like that for a long time. Second issue, Emily always had a crib bumper and this bed didn't have a crib bumper. She would stick her feet/hands through the rails and play with the electrical sockets behind her bed. Of course I used the plastic child proof safety things for the sockets but it still looked exposed through the bed. I had one panel left from making the curtains   
 so I made a simple headboard/bumper to cover the sockets up. I didn't want to spend money on something not that important so I searched around the house for supplies that I had on hand.


Directions to DIY simple headboard/bumper

1. I used the cardboard box that that bed came in and traced the top of the bed with it. I cut off the extra and also cut a few inches off from the bottom so the cardboard sits on the bed but slightly shorter by an inch and a half. 


2. I had some left over foam from a previous project so I cut the foam to the size and shape of the cardboard box. If you don't have foam or are lazy to go buy some just just a thick old blanket.


Here are the curtains I bought for $10. I had one panel left after making the curtains/valances.


This is the foam cut into the shape of the cardboard. 


3. Next, I folded the curtain in half lengthwise and traced the shape of the cardboard over it. 


4. I stitched the panel up and left the bottom open so I can stuff the cardboard and foam in place. If you use a thick blanket instead of foam, you don't have to cut the blanket into the shape of the cardboard. I would suggest stitching the blanket at the same time as the panel so they stick together. Stitching the blanket onto the curtains would ensure that it stays taunt and the cardboard would hold it up in place. 

5. Lastly, once the foam and cardboard are inside the panel, stitch up the bottom.  I wanted to add something special to Emily's bed so I added some bling. I hand stitched some bling buttons on the new headboard.  Buttons were purchased at a local fabric shop 10 for $4. 


6. I attached the headboard to the bed by cutting little holes on the back of the panel and tying it onto the rails. Its not super secure but its the same concept as a regular crib bumper. So far Emily has been really good with not pulling at the buttons or messing with the headboard.

So total cost to make the headboard/bumper was $4 since I used supplies that I had at home. Its not super fancy but it works for us.


The third issue I had with the bed was that it was so low on the floor. Its great that its low on the floor so if Emily falls she doesn't get hurt but our house is tall for a single story. I believe our ceiling height inside the rooms are 10 feet. I'm not sure if thats standard or not but Emily's bed felt so short and isolated in a sad corner. The crib was nice and tall and right at the entry way so it stands out but our little Emily was now tucked away in the corner all by herself.  I felt like I had to make her bed stand out and also be the center of attention. So another DIY canopy project it was. I quickly gathered some supplies from Amazon.

Supplies included buying a darice 19 inch metal ring for $6,  two white window scarf's for $14, and four hooks for $2 at kmart. I could simply buy a $20 pre made canopy but I searched and didn't like the net like fabric most were made out of and I also felt that I didn't like the shape. I wanted more shape and the canopy had to be out of Emily's way when she jumps on her bed.

Directions for DIY canopy bed

1. I painted the darice ring white with some left over paint. Its just a personal preference. 

2. Cut the white window scarf in half and stitch them onto the darice ring. 

3. Hang the ring up with some ceiling hooks. My dad also attached some white plastic thing before screwing on the hook for added security. Sorry I have no idea what that plastic thing is but just know its for added security in case some kids decide to hang on the canopy. But even if the ring falls on someone its not really going to hurt them. Its pretty lightweight. We hung it up with some clear thread thats really strong. I think its made for fishing. 

4. To create the shape that I wanted, we attached some simple hooks onto the wall and tied it with some  crystal beads I had saved from my bridal shower. 

Here is the window scarf taped up so I can see the shape. 


And here it is completed with Emily's bedding that I DIY for her a while ago. 


Here's a close up of the crystal beads that I used to hold the canopy in place. Its something I had on hand and I like that its clear and added just the right amount of sparkle.


We also hung a clearance treshold mirror above the bed. I got it at target for $12. Emily's bed almost never looks like that because she doesn't like to sleep with anything. Most of the time her bedding is tucked away under her bed drawer.


Cost breakdown of Emily's bed

*New toddler bed and mattress $150 from Amazon.
*New DIY bedding $10 for new twin sheet for blanket ($5) and white fitted sheet from Walmart ($10 for two).  Sorry no tutorial. I just used an old pillow and some old blankets to make her comforter/blanket. Bedding matches Kaley's crib bedding.
*DIY headboard/bumper $4
* Threshold mirror from Target $12
*DIY canopy $22

Total: Under $200.

Finally my babies room is almost complete. I am just waiting on some art work for Kaley's crib and doing a DIY paper mobile and I can say the room is finally complete.


Monday, February 10, 2014

Update on the nursery

The last few days I've been feeling so heavy and tired so I've only been able to do light projects around the nursery. Two things that I've completed are artwork above the diaper changing dresser and DIY valance/curtains.

The dresser use to sit where Emily's toddler bed is now but have moved it next to her bed instead for more room. The space above it felt a little boring so I added some free artwork that I made with some left over craft/metallic paper. I did have to buy two new frames from Aaron's brothers for $25 total. They had a buy one get one for one penny deal. I already had one frame so I only needed two more to complete the space.


Here is a better angle without so much glare. We have a really big and bright window in that room so its so hard to take pictures from certain angles. The colors are a lot lighter in person. The pink is almost a pale pastel pink. The letters are a medium brown color.


I also wanted to mention a little about the brown plastic weave basket below that I got at Homedepot for $9. Its a great size for baby/toddler clothes and plastic making it so easy to maintain. Our old basket was fabric and that didn't last very long. Then I had a cardboard box there for a very long time because I couldn't find anything that I really wanted to buy. Finally that wall is complete. Dresser was a DIY project a long time ago.


Next project that almost had Binh and I end up in a divorce was the DIY valance/curtains. Long story short, I bought two cheap rods for $3 each (here's the link) and Binh couldn't hang them up. Finally my dad hung them up which is probably better since it took him under 20 minutes to hang both up. 


Here are some terrible pictures. Its just impossible to take pictures of a large window with the sun in the background. 


In this picture you can see the Agen chair from Ikea that I just bought for the nursery. The chair is the perfect size for the room, super light so I can move it around, and very affordable at only $35. I still need to make a cushion for it with some left over brown fabric but that will be for another day.


Here's the view I get from outside of the living room. I'm slowly injecting pops of pink in the nursery. The main colors are pale gray, robins egg blue, brown, with bits of light pink. With Emily being the first girl, everything was pink everywhere so I think I got a little bored of seeing pink everywhere. This time around, I wanted more gender neutral colors.


Total cost to make and hang the valance and curtains were about $40. Not super cheap but I want to mention that our ceiling height is not standard. In order to hang curtains from the top of window to the floor it would take 108 inch curtains which are hard to come across and very expensive. Plus I also hung the valance and curtains for very cheap ($6 total). Considering real curtain rods alone usually cost $25+.


First I found some cheap white faux silk curtains at DD's discounts for $10 a pair. I picked up two. One for curtains and one for the valance. I had one panel left over so I made Emily's DIY headboard/bumper.


List of other supplies needed but not pictured here are cheap dollarstore white cardboard ($1 for two boards, I used three), light pink pom pom trim from Joanns for $5 with 40% coupon, pink and white polka dot ribbon to make three little bows, and two cheap $3 curtain rods from home depot (link).


Instructions

1. First I cut out a template using regular paper taped together. I didn't know what design I wanted so I just took a large round lamp shade and make half circles and taped them together. Then I folded one curtain panel in half lengthwise and traced my template over it. Trim off the extra and stitch the fabric together and flipped it over. 


2. I used the same paper template as above and cut the dollarstore cardboard for the same shape. Set aside.

3. I added pom pom trim to the bottom and bows to the top for interest.  Here it is without the bows and no cardboard backing. When I hung it up I realized that the white fabric was too light and I would be able to see the second curtain rod if I hung it across too low. Hence I came up with the white cardboard backing from Dollartree. It was a great idea because it made the whole valance look sturdier and have more shape.


4. Stitch the cardboard together with the valance. Make sure to leave about one inch of cardboard sticking out on top. The extra cardboard will be folded down and taped onto the rod. See next step.

5. Hang the valance up with clear packing tape. LOL. Since the backing was cardboard and the rod was metal, I discovered that tape worked well to keep them up.

6. Hang the second curtain rod right above the bottom of the valance. I only had to buy basic 85 inch panels to complete this project so that saved me a lot of money.

7. Extra step: I lined my curtains with some ikea twin flat sheets. Sheets were $4 each. Its so hard to find light blocking white curtains but lucky we have the blinds and the curtains are lined so it helps a lot. When the curtains are pulled no sun will touch my babies but a little light still comes through.

8. Since I lined the curtains I decided to redo the bottom hem because it was only two inches tall and I like 4 inch for a more custom look. Thats just me and I'm sure no one will notice but I like it better.


Here are two updated pictures from night time. Colors are way off but you can see the curtains better. 


Other pending nursery projects include DIY canopy for Emily's big girl bed, artwork above Kaley's crib, and DIY butterfly mobile.

Monday, February 3, 2014

From trash to treasure

I've been busy working on redoing Emily's big girl room/new baby nursery. I've mentioned before that they will be sharing a room. Sharing a room means more furniture and storage options. I'll do another post more on that in another post. Emily's nursery isn't a big room and what's worst is it does not have a closet. Previous owners took out the closet and made her room an office would be my guess. There's a slot for the closet but no real closet. Long story short, I've been on the lookout for a dresser or armoire for Emily since her old dresser/changing table will be for the baby.

Since her room wasn't big I needed something tall and didn't take much space. I searched and searched and found a few options but weren't happy with the price and quality of the product that I would get. Prices were usually about $150-300 for laminate/particle board and upwards of $400+ for real wood. I said no thank you and searched craigslist. Last weekend, I spotted a free ad for a white dresser that looks like it would fit the space and perfect for our little Emily. It was also located a few blocks from my parents home. Surprisingly when I saw it in person, it didn't look too terrible. Its by far from perfect but its free. All it really needed was some TLC.

Here are some before pictures of the dresser I picked up for free on Craigslist. It was wobbly but my dad quickly reinforced it. It was made out of particle board/laminate but it was free. I really can't complain. Here it is sitting in Emily's room. I wiped it down and sanitized it with some wipes.


Here are close up pictures of some of the chips.  This is the top front of the dresser.


Side view with a small chip on top.


It also came with ugly wood knobs so I quickly removed them and went to Michaels and picked up some clear crystal knobs on clearance for $1.50 each. 


Here's the picture after I screwed the knobs on the dresser. I contemplated repainting the whole dresser but the paint wasn't bad, it just had some minor chips. 


I finally decided that repainting just the chipped parts in white would be good enough. I just used some left over white paint from my previous projects and dabbed over the chipped parts. Here is the dresser once dried. 


Here's a close up of the chip in front of the dresser. Its hardly noticeable IMO.  I also went to Ross and picked up a box and jewelry stand for a few dollars. The white box on top was just a shoe box covered in white contact paper.


Here's a side view of the dresser where there use to be a chip.


Here's the inside of the dresser. Its actually quite clean and sturdy. 


Finally, here's a teaser of what I've been working on. This is Emily's big girl bed. Its a toddler day bed with storage underneath and I made a simple wanna be head/bed bumper. More on her toddler bed another day. I've completed her bedding and am working on making a canopy so that will be another post.